Making the static dynamic: Instagram Importer
Posted on in WebOne of the challenges of new tooling is solving problems you’ve previously found trivial. Having spent the past 5+ years with WordPress as my tool, I’ve gathered a number of functional plugins that do some programmatical heavy lifting for me. One of these plugins was the DsgnWrks Instagram Importer. When the call for an Instagram feed came in, I turned to this plugin. It added the cron schedules, scraped the images and saved the data ready to be styled.
Since dabbling in the world of static-site generators, I’ve not needed to add a social feed to a website. But for the new Tomango website, there’s a requirement for an Instagram feed.
After considering a number of available options, IFTTT seemed like a nice way to skirt around the Instagram API. Even though an API response provides cleaner data, it also needs to be triggered several times a day to check for new images – IFTTT handles that bit for me, and updates in realtime.
This also seemed like a good time to try some ‘serverless’ functions out. It’s a buzzword that’s pretty big at the moment and one I hadn’t tried till now.
Before getting any further, a massive hat-tip to Jeff Douglas’ blog post on AWS Lambda and GitHub. His EC2 to GitHub integration was a huge help getting my head around cloud functions for the first time.
The theory
The plan was as follows:
- The company Instagram account is updated
- IFTTT posts a WebHook to a cloud function with the image URL and caption
- The function scrapes that image from Instagram
- The function creates a Markdown file to become a blog post
- The function commits these two files
- Netlify rebuilds the site when the commit comes in
The reality
I kicked off working out how the GitHub API worked. They’ve got some pretty great documentation and I was able to authenticate and commit files using Postman without any real trouble. I could even Base64 a simple image and send it via a POST request and it would appear in the repository. But there was a small problem, the commit endpoint is for changing or creating one file, and this feature needed two: the image and the markdown file.
It was then I found Jeff’s aforementioned blog post and the GitHub NPM package. It included a createTree method that accepted an array of files – success! Looking at his code, you first needed to get the current state of the branch, create the tree, commit the tree, and finally update the branch reference.
So I set about porting the Postman tests over to a local node script that carried out the above set of steps – and it almost worked…
The Markdown content appeared in the repo and the image file was also created, but it was totally empty. I’d used the same Base64 encoded image and for whatever reason, the image data didn’t get saved. After several hours of researching blobs, SHA’s and Git trees, I found the createBlob method.
When creating an image through the JS API, you have to first upload it as a blob. GitHub then returns the SHA of the new blob, and that’s what you refer to in the files array. Once that had been sorted, we were cooking on gas.
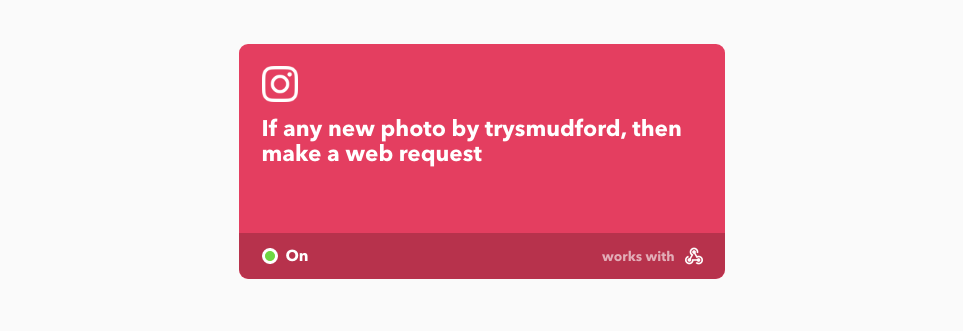
IFTTT lets you create a communication channel between two services – in this case: a POST request between Instagram and the cloud function. Once IFTTT is linked Instagram (pretty much one click), you provide the template of how you want to be notified:
- URL – where our cloud function resides
- Method –
POST - Content type:
application/json - Body:
{ "image": "{{SourceUrl}}", "caption": "<<<{{Caption}}>>>", "url": "{{Url}}", "key": "[OUR SECRET KEY]" }
IFTTT substitutes all the {{ mustache }} tags for Instagram photo details and the only thing we need to hardcode is a secret key. Cloud functions; like all backend services, need some security considerations. There’s nothing stopping a nefarious individual trying to POST arbitrary values to our function, much like WordPress sites getting hit by requests to wp-login.php. This secret key is a long string of random numbers, letters and symbols that I generated with a few rounds of the password generator. One of the first things the cloud function does is check to see if the key supplied matches the key in our function. By backing out early, we minimise the processing power being allocated to the function. It’s a bit ‘security through obscurity’ but this is my first foray into cloud functions and I’m still learning the ropes. Please do tweet me if you have suggestions for improving this.
The hosting
AWS Lambda and Google Cloud functions are the big players in this market. Lambda offers a hugely generous free tier but I found it near impossible to configure, the number of hoops I had to jump through on Amazon’s developer site was overwhelming and I ended up bailing out.
Google Cloud functions was much simpler to set up but their pricing model scares me. I’m used to fixed cost hosting at Tomango so it’s quite a strange prospect not knowing how much you’ll be paying each month. Even though this is quite a basic function, there was still doubt in my mind as to whether I’d be hit with bill each month. Much to learn, I still have.

Fortunately, Netlify came to my rescue, again. They’ve just moved Lambda Functions to private beta and; like all things they do, it was smooth and painless to migrate to their service. Functions are stored in your website repository but they’re not available directly via the web. They’re also able to access Build Environment Variables via process.env – a handy way to separate our secret keys from the code.
It is still in beta so there may be some quirks around, but my experience of it was very smooth. The local testing mode is particularly great!
The code
I’ll run through the prerequisites that you’ll need to run this sort of function:
1. Set up IFTTT
Create an IFTTT account and go to My Applets. Create new applet and set this to be Instagram and that to be a WebHook request. In the WebHook request box, fill in details as explained before:
- URL – the format is: [site url]/.netlify/functions/[function name]
- Method –
POST - Content type:
application/json - Body:
{ "image": "{{SourceUrl}}", "caption": "<<<{{Caption}}>>>", "url": "{{Url}}", "key": "[OUR SECRET KEY]" }
2. Create a GitHub personal access token
The GitHub API can be authenticated in a number of ways – the one I decided on was ‘personal access tokens’. Head to the tokens page on your GitHub account and generate a new token with repo access.
3. Specify your build environment variables
Go to the settings page for your website on Netlify and click on ‘Build & deploy’. In the section called Build environment variables, create the following four variables:
- IG_GIT_USER – your GitHub username
- IG_GIT_REPO – the name of the repository you wish to publish to
- IG_GIT_TOKEN – your personal access token from step two
- IG_SECRET_KEY – the same key specified in your IFTTT configuration
4. Prepare the repository
I’m using the victor-hugo framework for the site so I created the directory ./src/functions and created the fileinstagram.js in there.
Within your netlify.toml file, create a new line under [build] and add functions = "./functions", this is a different directory to our ./src/functions – this is because there’s a transpilation step required to bundle up our raw function.
Then npm install netlify-lambda github async https packages. The first is the code that transpiles the function and prepares it to be uploaded. The other three are needed for our Lambda function.
In package.json, I updated my build command to include the function generation: gulp build && netlify-lambda build ./src/functions - you’ll need to do something similar with your setup.
It’s also worth .gitignore‘ing the generated functions folder by adding /functions/. Like SCSS to CSS, the build step on the server will create the production files, keeping the repository nice and clean.
5. Create the function
Finally some code!
const githubapi = require('github'),
  async = require('async'),
  https = require('https');

exports.handler = function(event, context, callback) {
  const { caption, url, image, key } = JSON.parse(event.body);
  const { IG_GIT_USER: user, IG_GIT_TOKEN: token, IG_GIT_REPO: repo, IG_SECRET_KEY } = process.env;

  if (key !== IG_SECRET_KEY) return callback(null, { statusCode: 401, body: 'Incorrect key supplied' });
  if (!image || !caption || !url) return callback(null, { statusCode: 400, body: 'Params not supplied' });

  const time = Date.now();
  const date = new Date();
  const github = new githubapi({ version: '3.0.0' });
  github.authenticate({
    type: 'token',
    username: user,
    token
  });

  async.waterfall([

    function scrape_image_from_instagram(callback){
      const imageSplit = image.split('/');
      const imageURL = 'https://scontent.cdninstagram.com/hphotos-xaf1/t51.2885-15/s1080x1080/e15/' + imageSplit[imageSplit.length - 1];
      let imageData = '';
      https.get(imageURL, (resp) => {
        resp.setEncoding('base64');
        resp.on('data', (data) => { imageData += data});
        resp.on('end', () => callback(null, imageData));
      }).on('error', (e) => new Error(`Error scraping image: ${e.message}`));
    },


    function upload_image_blob(image, callback) {
      github.gitdata.createBlob({
        owner: user,
        repo: repo,
        content: image,
        encoding: 'base64'
      }, function(err, data) {
        if (err) return new Error(err);
        callback(null, data.data.sha);
      });
    },


    function get_branch_reference(image, callback){
      github.gitdata.getReference({
        owner: user,
        user: user,
        repo: repo,
        ref: 'heads/master'
      }, function(err, data){
        if (err) return new Error(err);

        callback(null, { image: image, commit: data.data.object.sha});
      });
    },

    // Create a tree ready to commit
    function create_tree(result, callback){
      const content = `---
title: Instagram - ${date.toString()}
blog/categories:
- instagram
date: ${date.toISOString().slice(0,-14)}
image: /images/blog/${time}.jpg
originalURL: ${url}
---

${caption}`;

      const files = [{
        path: `site/static/images/blog/${time}.jpg`,
        mode: '100644',
        type: 'blob',
        sha: result.image
      }, {
        path: `site/content/blog/${time}.md`,
        mode: '100644',
        type: 'blob',
        content: content
      }];

      github.gitdata.createTree({
        owner: user,
        user: user,
        repo: repo,
        tree: files,
        base_tree: result.commit
      }, function(err, data){
        if (err) return new Error(err);

        result.tree = data.data.sha;
        callback(null, result);
      });
    },


    function commit_the_files(result, callback){
      github.gitdata.createCommit({
        owner: user,
        user: user,
        repo: repo,
        message: `New instagram image: ${date.toString()}`,
        tree: result.tree,
        parents: [result.commit]
      }, function(err, data){
        if (err) return new Error(err);

        result.new = data.data.sha;
        callback(null, result);
      });
    },


    function update_git_reference(result, callback){
      github.gitdata.updateReference({
        owner: user,
        user: user,
        repo: repo,
        ref: 'heads/master',
        sha: result.new,
        force: true
      }, function(err, data){
        if (err) return new Error(err);

        callback(null);
      });
    }

  ], function (err, result) {
    if (err) return callback(null, { statusCode: 400, body: err.message });
    else return callback(null, { statusCode: 200, body: 'Image imported' });
  });

};
6. Deploy!
Unlike AWS/Google Cloud and their cumbersome ‘upload a zip’ setup, deploying with Netlify was as simple as committing the changes and pushing! If you check within the site area on Netlify and click on ‘Functions’, you should see the newly create function listed there. Clicking each function shows the last hour of logs, and the URL endpoint for the it.
The result
Sadly I’m not able to show the finished result of the feed, that’s a few weeks off. But the generated files look like this:
/site/content/blog/[timestamp].md
---
title: Instagram - Sat Feb 10 2018 22:17:31 GMT+0000 (UTC)
blog/categories:
- instagram
date: 2018-02-10
image: /images/blog/1518301051062.jpg
originalURL: https://www.instagram.com/p/BelWi3En8gz/
---

#macro
/site/static/images/blog/[timestamp].jpg

As mentioned above, this is my first foray into serverless functions and I’m still very much a beginner - please tweet me if you have suggestions for improvement!
Posted on in Web